How to use WPF controls in DXCore Tool Window plug-in
DXCore Tool Windows are based on the Windows Forms technology and can use only Windows Forms controls. However, if you would like to use WPF controls there is a work-around intended to use the ElementHost Windows Forms control that is used to host a Windows Presentation Foundation (WPF) element.
There are four steps we should perform:
- Create a new DXCore tool window plug-in
- Add a new WPF User Control project
- Implement the WPF composite control
- Host the WPF control in the DXCore plug-in
Step #1 – creating a new DXCore tool window plug-in
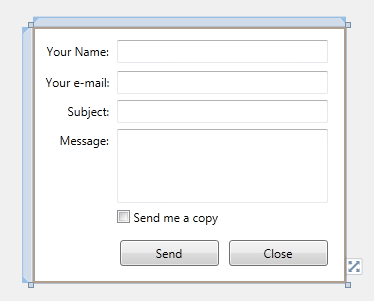
To create a new DXCore plug-in, please read the appropriate article: How to create a new DXCore plug-in. Once the DXCore tool window is created (I have named it as WPFToolWindow), we can add a new WPF User Control project. In Windows Forms, we can host only a WPF element, so to make a new user control, we would use the Grid element in WPF and put the controls into it. In this sample, we will create a standard contact form and use the Text Box, Label and Button WPF controls.
Step #2 – adding a new WPF User Control project
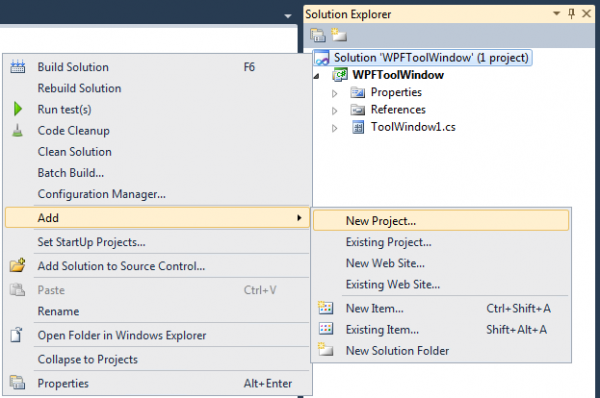
- Right-click the plug-in solution in the Solution Explorer, and select Add -> New Project…
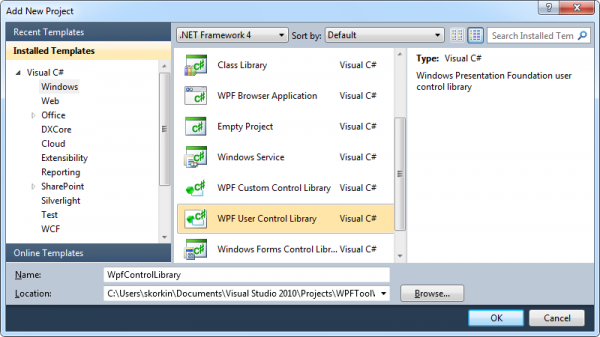
- Select the WPF User Control Library.
- Name the new project, e.g. WpfControlLibrary and click OK:
- It would create UserControl1.xaml and UserControl1.xaml.cs in the new project.
- Inherit the UserControl1 from the Grid element instead of the UserControl. As I stated, we cannot host a control – rather, we can host an element on the Windows Form. This change has to be done in both UserControl1.cs:
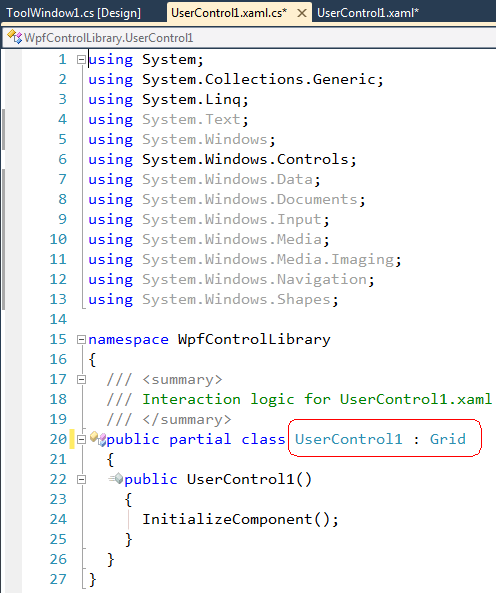
and UserControl1.xaml.cs:
Step #3 – Implementing the WPF composite control
- Drop and design WPF controls as required. For example, like this:
- Implement the controls logic as necessary.
- Build the WpfControlLibrary project.
Step #4 – hosting the WPF control in the DXCore plug-in
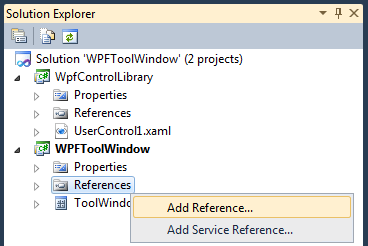
- Add a new reference to the DXCore plug-in:
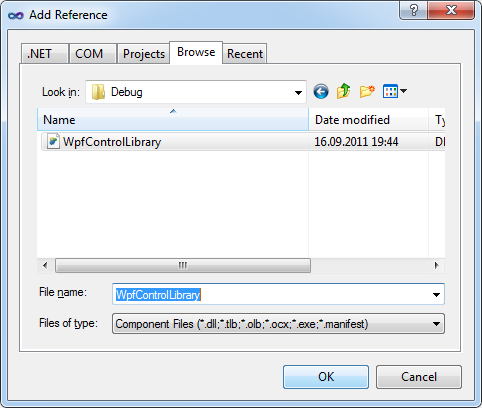
- Locate the WpfControlLibrary assembly and click OK to add it:
- Drop the ElementHost (from the WPF Interoperability tab) on the Tool Window design surface:
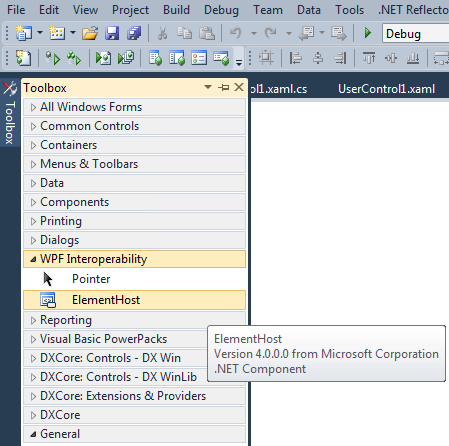
- Set the Dock property to Fill in the elementHost1 control if necessary.
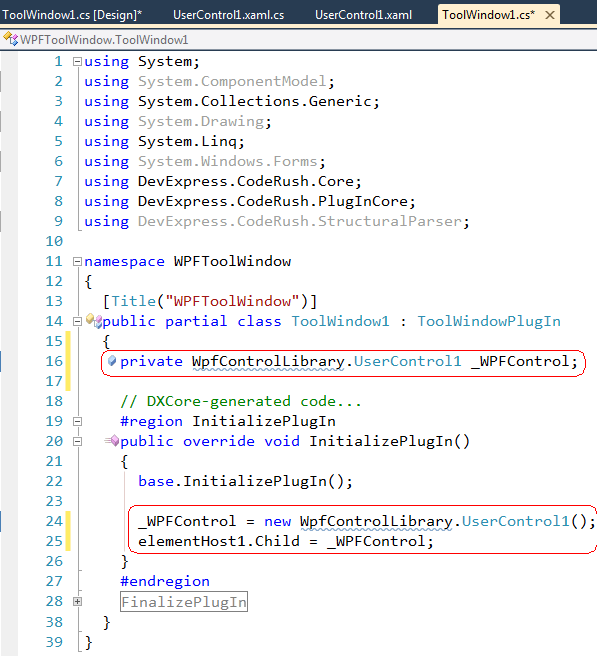
- Open up the tool window’s source code file, and create the class level variable of the UserControl type:
WpfUserControlLibrary.UserControl1 _WPFControl = null;
- Add the following code to the InitializePlugIn method, to create an instance of the WPF User Control and attach it to the Element Host:
_WPFControl = new WpfControlLibrary.UserControl1();
 elementHost1.Child = _WPFControl;
- Make sure that the tool window size is enough to display the WPF control, i.e. set its MinimumSize property.
Now, compile the solution and test the new tool window plug-in in a new instance of the Visual Studio:
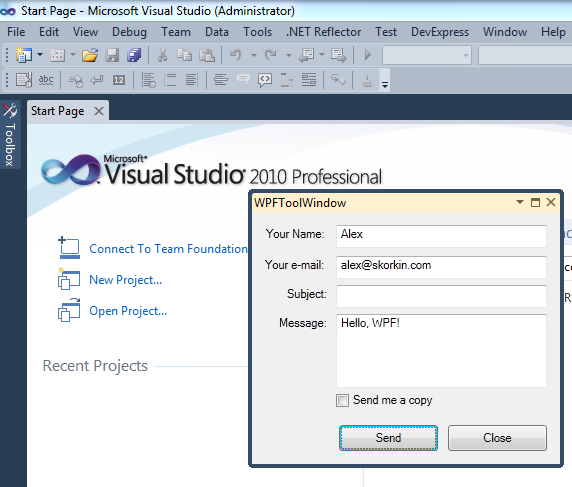
The sample plug-in is attached (20,125 bytes, C#, VS2010). If you have any questions or additions, please leave them as comments below to this blog post.
—– Products: DXCore Versions: 11.1 and up VS IDEs: any Updated: Sep/16/2011 ID: D113