How to use Action DXCore control
December 14th, 2010
There are only four important things to make the Action component available and working:
- Create a new DXCore plug-in if you haven’t done it yet
- Drop the Action control on the plug-in designer surface
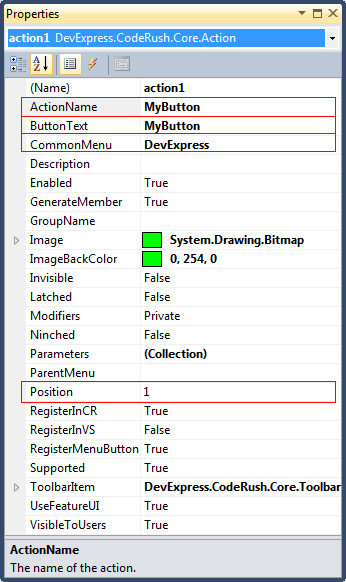
- Fill the ActionName property
- Handle the Execute event
That’s it. Using the ActionName you are able to assign a shortcut key, and once it’s pressed, the Execute event will do its job – perform the code you added into the event handler.
To make Action available inside the Visual Studio’s menu fill the following properties:
- ButtonText – the caption of the new button
- CommonMenu – the parent menu where the new button will reside
- Position – the position inside of the parent menu

Here is the code of the Execute event handler:
CSharp code:
private void action1_Execute(ExecuteEventArgs ea)
{
  MessageBox.Show("This is MyButton from the DevExpress menu.");
}
Visual Basic code:
Private Sub action1_Execute(ByVal ea As ExecuteEventArgs) Handles action1.Execute
  MessageBox.Show("This is MyButton from the DevExpress menu.")
End Sub
- Next, compile the plug-in
- Open a new instance of the Visual Studio IDE
- Load IDE tools if they’re not loaded automatically
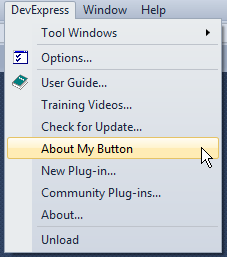
- Verify that the new button appeared inside the DevExpress menu:

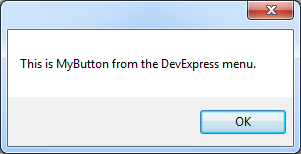
Once you click the button inside of a menu or press the specified shortcut, your code inside of the Execute event handler will be executed:
